2. Transform
The Transform feature in Nutil enables the batch renaming, rotation and downscaling of tiled TIFF images with output in TIFF format (max size: 4 GB). It also supports thumbnail creation in PNG format.
Warning
Nutil cannot transform images that exceed 4 GB (it does not support BigTIFF). In some cases, images may exceed 4 GB during transformation. For example, by rotating an image, pixels are added to keep it rectangular, which increases its size. This may trigger an error.
Tip
If Nutil gives error message “Maximum TIFF file size exceeded”: try with JPEG compression.
How to run Transform
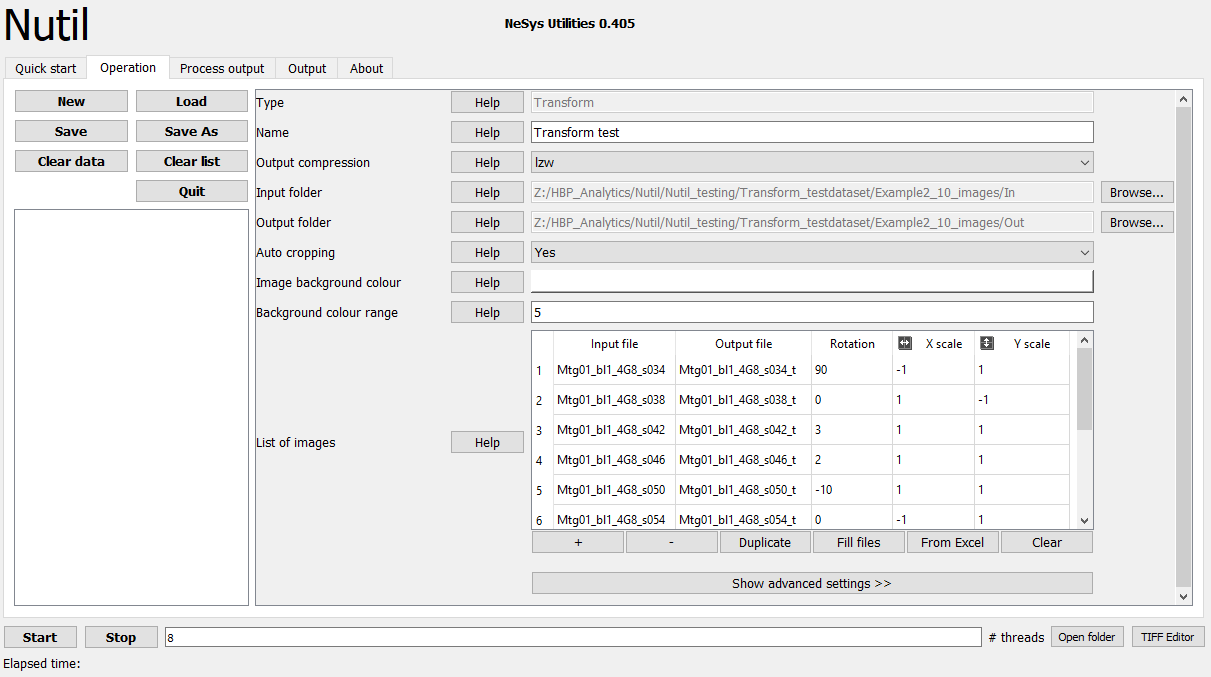
Click “New”. Select “Transform”.
Give the project a name (for documentation purposes).
Select compression type: LZW (lossless - all information retained, larger images), JPEG (lossy - some unimportant info removed, smaller images) or None. If in doubt, select LZM.
Select the “Input folder” containing the images to be transformed and the “Output folder” where you want the images to be saved.
Switch autocropping “on” or “off”. This automatically crops the image to remove pixels added during rotation. To use the autocropping feature, fill in the background colour of the images (e.g. white) and a background colour range (see the “Help” button in Nutil for more info).
In “List of images” list the files that you wish to transform. Either press “Fill files” to automatically populate the list with the files in the input folder, and enter your desired transformation parameters. Alternatively, fill in the Excel sheet with your files and transformation parameters (a template is included as part of the Nutil download) and import “From Excel”. Rename your files by entering new names for the “Output file”.
To downscale the images and convert to PNG images only (for example, to segment in ilastik), leave the transformation parameters at the default settings. Open “advanced settings” and select “only create thumbnails”. For the thumbnail size enter the required resize factor. e.g. 0.5 (this will halve the length along the x-axis and y-axis, reducing the image area by 0.25).
On completion, press “Save As”. This saves a copy of your parameters in a text file in .NUT format. This is for your own records, but may also be reloaded via the “load” button.
Nutil automatically detects the number of core processor available (8 in the example). Choose one less than the total available to ensure adequate processing power (6 or 7 here).
Press “Start” and wait until the process is complete.
Note
Transformation can take anything from minutes to hours depending on the size and number of images.
|